
Getting started
Install Chachi POS on a Windows PC or an Android tablet, set up your store with the setup wizard, link your subscription and sign in. At the end you will find a map of the menu and what each role can do.
What you need
Chachi POS runs on one computer or tablet in the store, and keeps everything on it. You do not need the internet to sell, print or back up.
| Item | What works |
|---|---|
| Computer | A Windows 10 or 11 PC (64-bit). An ordinary 4 GB computer with a 1366 × 768 screen is enough. |
| Or a tablet or phone | Android 8 or newer. |
| Receipt printer | An ESC/POS thermal printer, 58 mm or 80 mm paper, by USB or network. On Android, a network (Wi-Fi or LAN) printer only. |
| Cash drawer | One that plugs into the receipt printer. It opens on cash sales. |
| Barcode scanner | A USB scanner (on Android, USB or Bluetooth) that types like a keyboard and sends Enter after each scan. |
| USB stick | For copying backups off the computer once a week. |
| Google account | For the owner only, to link the subscription. |
| Internet | To link the subscription, then at least once every 30 days so it can be checked. |
Install on a Windows PC
Who: usually Chachi's, on installation day
Chachi POS comes as one installer file, ChachiPharmacyPOS-Setup- plus the version number. It needs no internet and no administrator password.
- Copy the installer from the USB stick to the PC and double-click it.
- Keep the suggested install folder, or choose another, and let it install.
- When it finishes, Chachi POS starts and opens the setup wizard (below).
A Chachi Pharmacy POS shortcut is added to the desktop and the Start menu. The store's data is kept in %LOCALAPPDATA%\ChachiPharmacyPOS.
Important: if Windows asks for an administrator password while installing, stop and call Chachi's. If Windows warns that the file is unrecognised, continue only if it came to you directly from Chachi's.
Updates never install themselves. A new version comes as a new installer: close every shift, quit the app, and run it over the old one in the same folder. It backs up your data before changing anything. Uninstalling removes the program only; the database and backup folder stay, and reinstalling finds them.
Install on an Android tablet or phone
Who: Chachi's installs the app for you
Install Chachi POS from Google Play, or ask Chachi's for the app. It is the same program as on Windows, with the same screens and rules.
- Open Chachi POS. On Android 10 and older, it first asks to use the phone's storage: tap Allow. Newer phones do not ask.
- The setup wizard opens. It is the same as on Windows (below).
Backups go to Documents/ChachiPOS Backups, which stays if the app is removed and can be copied to a computer by USB cable. After the app is installed again, an old backup is opened with Restore from a file; the Backups list shows only the ones the new install made.
Important: on Android 10 and older, if you refuse the storage question, backups stay inside the app and are deleted if it is uninstalled. The whole store lives on the tablet, so losing it without a backup copied off loses the store.
On Android: finish the setup wizard on the day the app is installed, before installing other apps. Use a network receipt printer. Downloaded files, such as the Excel template or an export, go to Downloads.
Use it in a web browser
Who: the store owner, with Chachi's
Chachi's can run your store on its own server instead of on a PC in the store. Nothing is installed: the store has a web address such as pos.chachisoftware.store/s/yourstore, and anyone with a login opens it in Chrome or Edge on a PC, laptop, tablet or phone. Bookmark it on each counter device.
The owner can also open it from pos.chachisoftware.store/stores: sign in with the Google account that owns the store and click Open on the web. Staff do not use Google; they open the store's address and sign in with their POS username and password.
- Chachi's sends you the address and a setup code (four groups of letters and numbers).
- Open the address. The setup wizard asks for the Setup code at the top of step 1; type it, then set up the store as below. The code stops anyone else from setting up your store first.
- Backups are kept on Chachi's server, so the wizard's backup step has nothing to choose. Download a copy every week from Admin → Backups (Make a backup now).
- Receipts print through the browser's print box. See Set up the receipt printer.
Important: the web version needs the internet to sell. If the store's connection is down, the counter stops until it is back. A store that must sell through outages should use the Windows or Android app.
A barcode scanner that types into the computer works in the browser as it does in the app. A cash drawer on the receipt printer cannot be opened from a browser; open it with its key.
Use the web and phones or PCs together
Who: the store owner
A store can be on the web and on phones and PCs at the same time, whichever it started on. The web copy holds the store's records. Each connected phone or PC keeps a full copy, sells without the internet, and catches up with the web and the other devices whenever it is online. The web itself needs the internet.
Your store is on the web; add a phone or PC
- Install Chachi POS on the phone or PC. The setup wizard opens.
- At the top of step 1, click Connect to a store on the web.
- Type the store's web address, the owner's username and password, and a name for this device such as Counter 1. Click Connect.
- The store downloads. Click Go to sign-in; everyone signs in with the same usernames and passwords as on the web.
- Link this device's own subscription seat under Admin → Subscription.
Your store is on a phone or PC; put it on the web too
- Ask Chachi's for a web copy. They send its address and a setup code. Do not set it up in the browser.
- On your device, open Admin → Web & devices. Type the web address, the setup code and your password, and click Put this store on the web.
- The store uploads, and this device becomes the store's first device. Keep selling as before. Open the web address in a browser and sign in as usual; add more phones or PCs as above.
What works without the internet
On a connected phone or PC, without the internet you can still sell (cash, GCash, QR Ph, credit), take payments on account, process returns, move cash in and out, open and close shifts, receive deliveries, adjust and count stock, and add or edit customers. It all goes to the web when the connection is back. Products and prices, users and passwords, settings and the store's details need a connection: that way no two devices can disagree about a price.
Each device's receipts carry its letter, for example SALE-A-20260915-000012 on device A and SALE-B-… on device B, so two devices never print the same number. Sales made on the web keep the store's usual numbers.
Important: two devices offline at the same time can both sell the last box, or take a customer past their limit. When they sync, the stock shows below zero or the balance over the limit, and the dashboard says so. If two devices add the same customer code offline, both customers are kept and the second code gets its device's letter, such as NENA-B.
Run the setup wizard
Who: the store owner, usually with Chachi's
The wizard runs once, the first time Chachi POS starts. Nothing is saved until you press Finish setup; if the app is closed halfway, it starts again at step 1. Use Next and Back to move between steps.
Moving a store that already exists to this computer? Skip the steps: click Restore a backup at the top of step 1 and choose the old computer's backup. See Moving to a new computer.
- 1 · Your store. First choose What kind of store is this?: Pharmacy, Agrivet, Café / Restaurant or Sari-sari & wholesale. It sets the defaults a store like yours starts with (for example, whether the senior citizen and PWD discount is on) and shows on the sign-in screen as Chachi POS (Pharmacy). It cannot be changed after setup. Motorcycle shop is shown as coming soon. Then type the Store name, Address, Contact number and, if you have one, the TIN. They print at the top of every receipt.
- 2 · Tax. Choose Not registered (prices are final), Non-VAT (percentage tax) (prices are final, no tax shown on the receipt) or VAT-registered (prices include 12% VAT, and receipts show a VAT summary). Ask your accountant if unsure. Only the owner can change it later.
- 3 · Owner account. Type the owner's Full name and a Username (3 to 32 characters). Choose a Password of at least 10 characters and repeat it in Confirm password. The Counter PIN (6 digits) is optional.
- 4 · Recovery code. Read the note and tick I understand the code is shown once and I am ready to write it down. Have paper and a pen ready.
- 5 · Backup folder. Keep the suggested folder (on Windows, Documents\ChachiPOS Backups) or type the full path of another, ideally on a second drive. Press Finish setup.
- Setup complete shows your recovery code, such as NQ85-YP3L-U8H2-CFU6. Write it down now; it is never shown again.
- Press I have written it down — next to load your products now, or Skip — go to the application.
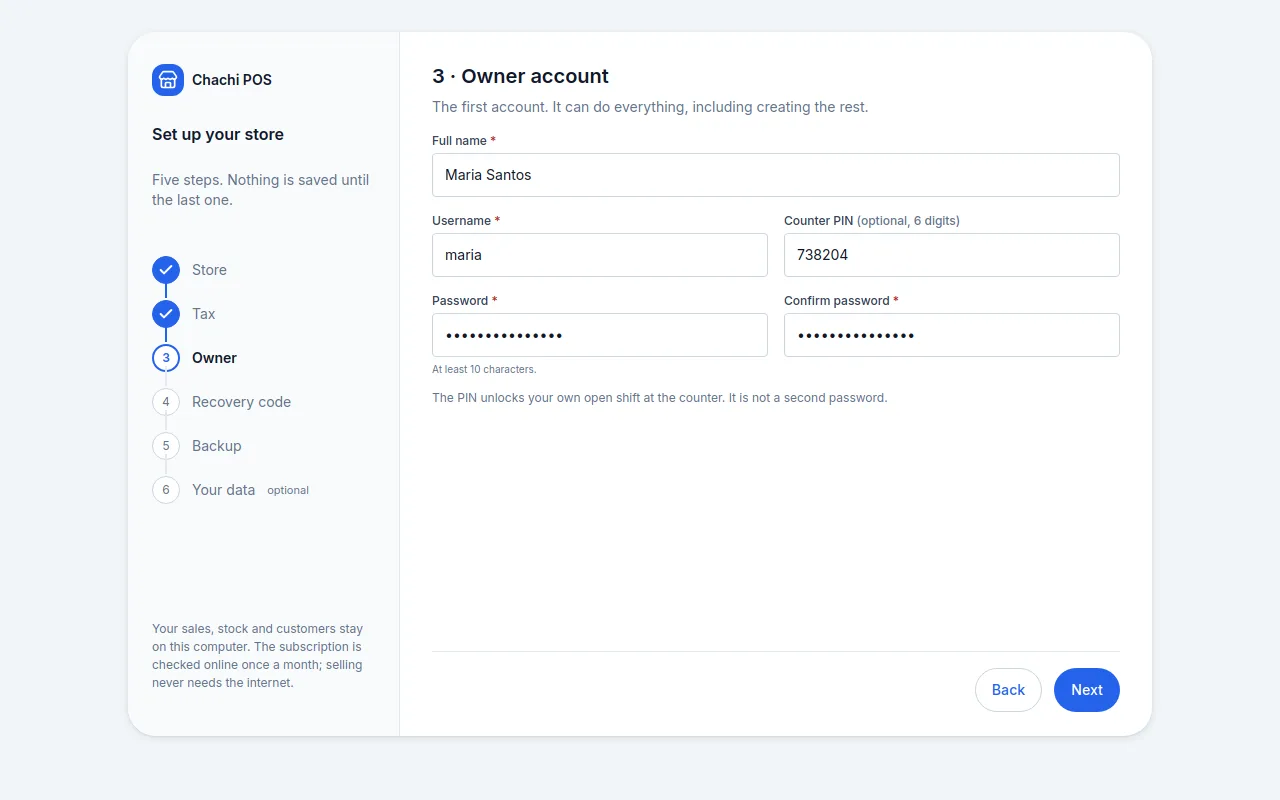
Step 6 · Your data (optional)
Step 6 loads the products, opening stock and customer balances you already have from one Excel workbook: Download the Excel template, fill it in, choose it, press Check, then Load this data, and finally Go to the application. You can also do it later in Admin → Export / import. Details are in Products and prices.
If a step is refused
| Message | What to do |
|---|---|
| The two passwords do not match. | Type the same password in both boxes. |
| The PIN is exactly 6 digits, or leave it empty. | Use exactly 6 digits, not all the same (111111) and not a run (123456, 654321). |
| The backup folder must be outside the application data folder… | Choose a folder in Documents or on another drive. |
| The backup folder must be a full path. | Type the whole path, such as D:\Store Backups. |
| That folder is not writable… | The app could not save a test file there. Choose another folder. |
Keep the recovery code safe
Who: the store owner
Chachi POS works offline, so there is no "forgot password" email. The recovery code is the only way back into the owner account if the owner password is lost. The app keeps only a scrambled copy that cannot be read back, so neither the app nor Chachi's can show it to you again.
- Write the code on paper exactly as shown, with the dashes.
- Keep it with the business permits or the cash box, not in the drawer beside the computer.
- Do not photograph it onto a phone that other people use.
If the paper is lost, or somebody may have seen it, make a new code while you still know the password: click your username at the bottom of the menu, then New recovery code, and type your password. The new code is shown once and the old one stops working at once. Tick I have written it down. to close it.
To use the code when the password is forgotten, click Forgot the owner password? on the sign-in screen (see I forgot the owner password).
Important: if the owner password is forgotten and the code is lost too, nobody can get into the owner account.
Link your subscription and start the free trial
Who: Owner, with the Google account that owns the store
Until the POS is linked, no shift can be opened, so nothing can be sold. Linking needs the internet once. You sign in with Google on a web page, not in the POS, and the POS never sees your Google password. Everyone else keeps signing in with their own POS username.
- Sign in as the owner and open Admin, then the Subscription tab. It says Not linked.
- Press Link this POS. A code such as K7QM-3XPD appears under Approve it from any browser. It works for 15 minutes.
- Press Open the link page. Or, on your phone, go to pos.chachisoftware.store/link, type the code and press Continue.
- Press Continue with Google and sign in with the store owner's Google account.
- On Approve this device?, check the code matches. For your first device, check the Store name. For another device of the same store, choose your store. Press Approve.
- The page says Linked. Within a few seconds the POS shows Active and "Subscribed until" a date.
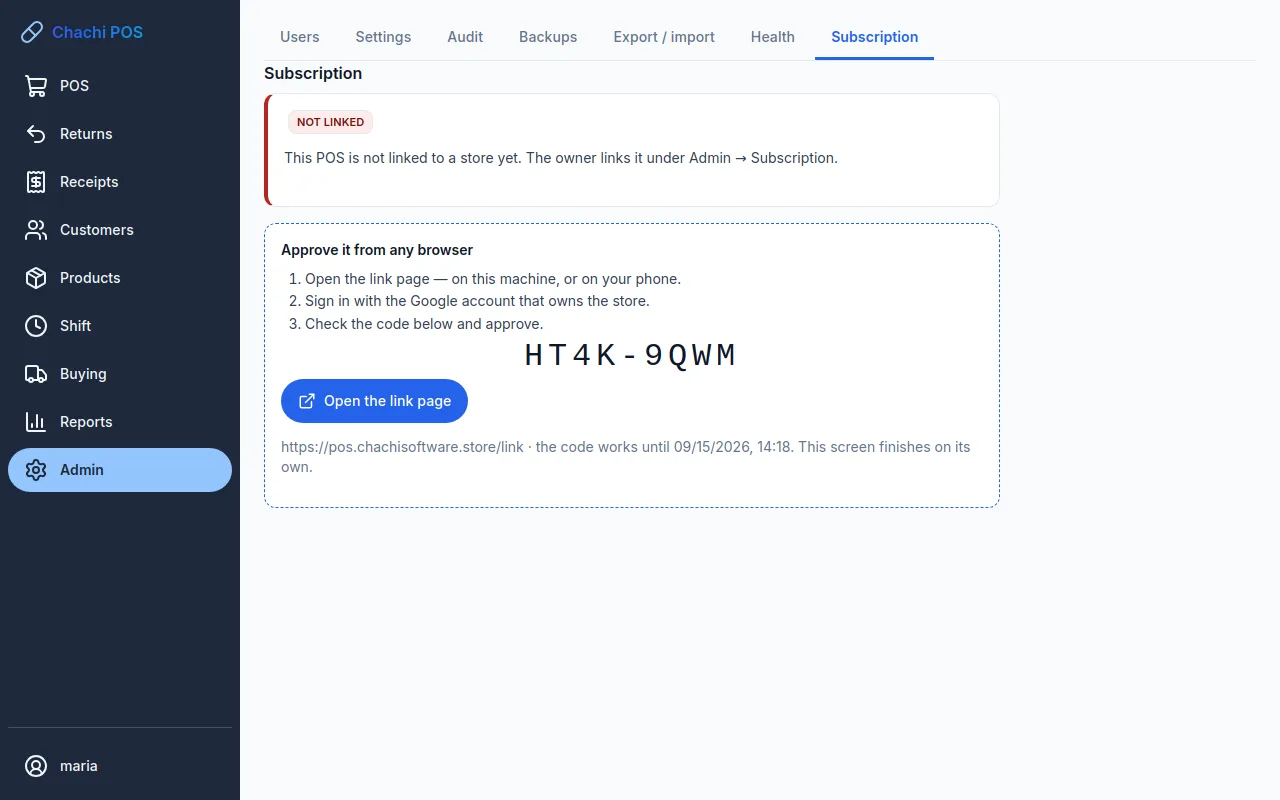
A new store starts on a 14-day free trial, shown as Paid until. To continue after it, contact Chachi's to pay by GCash or bank transfer; the POS picks up the new date at its next check. It checks by itself whenever it has the internet, and must get online at least once every 30 days. The warnings are explained in The subscription screen and its warnings.
| If you see | What to do |
|---|---|
| The licence server could not be reached… | Connect to the internet and press Link this POS again. |
| The code expired before it was approved. Start again. | Get a new code and approve it within 15 minutes. |
| The owner denied the link. | Deny was pressed. Start again and press Approve. |
| Only the owner manages the subscription. | Sign in with the owner account. |
Tip: a new or replacement device joins the same subscription. Link it the same way and choose your existing store.
Sign in
Who: everyone
- Type your Username and Password.
- Press Sign in or Enter.
A Cashier lands on POS, an Inventory clerk on Products, and a Manager or Owner on the Reports dashboard. To sell, open your shift first (Selling at the counter).
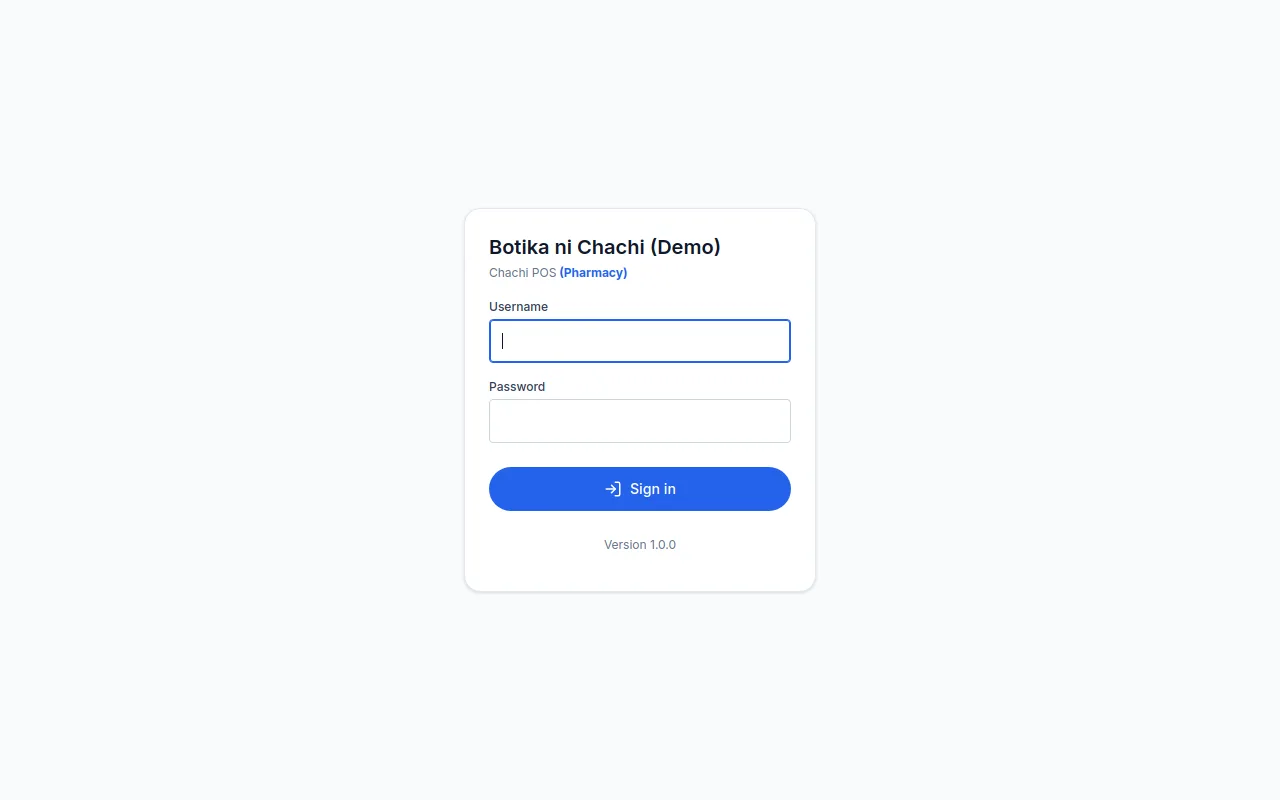
Incorrect username or password is shown for either mistake. Check Caps Lock and try again. After 5 wrong tries in a row the account is locked for 15 minutes (This account is locked for … more minutes…). Wait, or ask the owner to set a new password in Admin → Users, which unlocks it at once (Reset a password or PIN). Staff cannot change their own password.
When the screen locks, and your PIN
Who: everyone
After 15 minutes without use (the owner can change this in Admin → Settings), your session ends. The screen locks the next time someone clicks or scans. The cart is not lost.
- If your shift is open, you see Screen locked and Your cart is kept.
- Type your 6-digit PIN and press Unlock. You are back where you were.
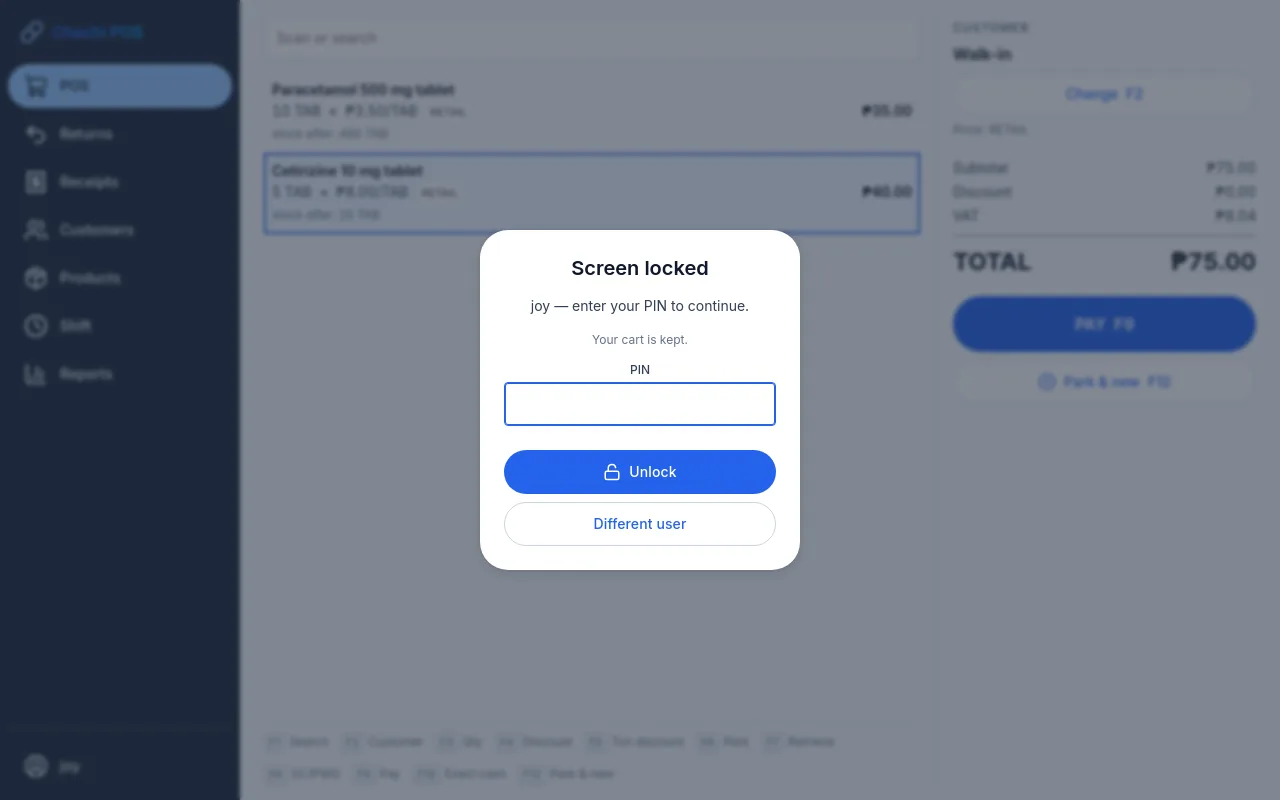
A PIN only unlocks your own open shift; it is not a way to sign in. If your shift is closed, the sign-in screen appears with your username filled in and A PIN unlocks an open shift. Sign in with your password to open one. If you have no PIN, press Different user and sign in with your password.
A PIN unlock is for carrying on at the counter: selling, looking items up, receipts, collecting a customer's payment and cash in or out all work as before. It never opens Settings, Users, product editing, reports, returns, or closing the shift. If you see A PIN session cannot … Sign in with your password., click your username at the bottom of the menu, press Different user, and sign in with your password. Your cart is kept.
Important: wrong PINs count toward the same 5-try lock as wrong passwords. Do not guess.
Lock the screen, sign out or change user
Who: everyone
Click your username at the bottom of the menu. A box opens with your account:
- Lock screen (if you have a PIN): the screen locks and you come back with your PIN. To hand over from the lock screen, press Different user.
- Sign out: the sign-in screen appears for the next person, with … is signed out. A cart in progress stays on its shift. Nothing was thrown away.
- Change password and Change PIN (or Set a PIN): see below.
Closing the app also signs you out.
Tip: never let someone sell under your name. Every sale, discount and drawer count is recorded against whoever is signed in.
Change your own password or PIN
Who: everyone
- Click your username at the bottom of the menu, then Change password.
- Type your Current password, then the New password (at least 10 characters) twice, and click Change password. You see Password changed.
For a PIN, click Change PIN (or Set a PIN), type your password, then the six digits twice. Remove my PIN takes it off; the screen then asks for your password when it locks. A PIN cannot be all one digit (111111) or a run (123456).
If the current password is wrong, the box says That is not your current password. and stays open. Wrong tries count towards the same 15-minute lock as the sign-in screen. After a PIN unlock these choices are hidden: sign out and sign in with your password first.
Find your way around
Who: everyone
The menu runs down the left side. You only see the items your role can use.
| Menu item | What it is for | Who sees it |
|---|---|---|
| POS | Sales and payment (Selling at the counter) | Owner, Manager, Cashier |
| Returns | Taking items back (Returns, voids and reprints) | Owner, Manager, Cashier |
| Receipts | This shift's receipts, to reprint or void | Owner, Manager, Cashier |
| Customers | Customers, utang and collections (Customers and utang) | Everyone; Inventory can only look |
| Products | Catalogue, stock, batches, counts (Products, Stock) | Everyone; Cashier can only look |
| Shift | Open and close your shift, cash in and out (Cash and closing) | Owner, Manager, Cashier |
| Buying | Suppliers, orders and deliveries (Suppliers and deliveries) | Owner, Manager, Inventory |
| Reports | Dashboard, alerts and reports (Reports) | Owner, Manager, Cashier (own shift) |
| Admin | Users, settings, audit, backups, export and import, health, subscription (Users, settings and backups) | Owner; Manager without Users |
On a smaller screen the menu shows icons only; hold the mouse over one to see its name.
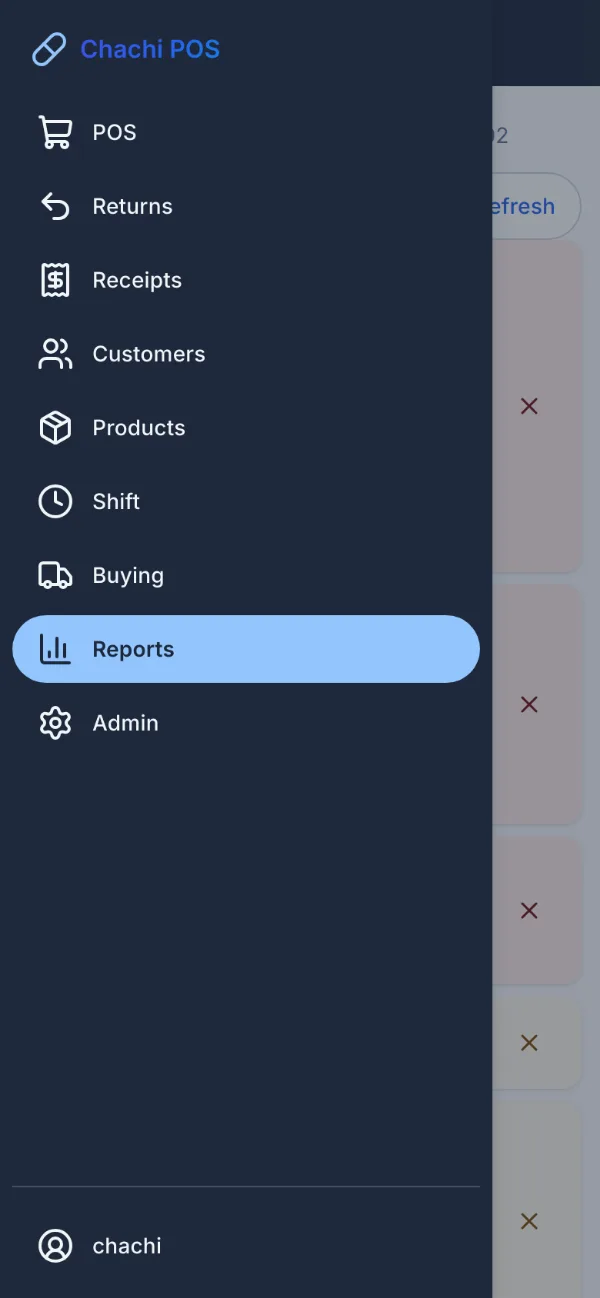
On Android: on a phone, tap ☰ at the top left to open the menu, and tap outside it to close it. On a tablet the menu is the icon strip down the side. Both work in portrait and landscape.
Roles: who can do what
Who: the owner sets each person's role in Admin → Users
Every person has one of four roles, checked on every action. When a cashier needs something beyond their role, such as a void, a manager or owner approves it on the spot.
| What | Owner | Manager | Cashier | Inventory |
|---|---|---|---|---|
| Sell at the counter, reprint a receipt | Yes | Yes | Yes | — |
| Discount up to own limit (default 2% cashier, 5% manager, 100% owner) | Yes | Yes | Yes | — |
| Approve a bigger discount, a sale below cost, or an over-limit credit sale | Yes | Yes | — | — |
| Void a sale | Yes | Yes | With approval | — |
| Take back a return | Yes | Yes | Yes | — |
| Open and close own shift, cash in and out | Yes | Yes | Yes | — |
| Close another person's shift | Yes | Yes | — | — |
| Add or edit customers | Yes | Yes | Yes | Look only |
| Record a customer's payment (collection) | Yes | Yes | Yes | — |
| Set a credit limit | Yes | Yes | — | — |
| Write off a customer's balance | Yes | — | — | — |
| Add or edit products | Yes | Yes | — | Yes |
| Change a selling price | Yes | Yes | — | — |
| See and change product cost | Yes | — | — | — |
| Adjust stock | Yes | Yes | — | Yes |
| Approve a stock count | Yes | Yes | — | — |
| Buying: orders, suppliers, deliveries | Yes | Yes | — | Yes |
| Sales and profit reports | Yes | Yes | Own shift | — |
| Stock reports | Yes | Yes | Look only | Yes |
| Admin: day-to-day settings, backups, export, audit trail, health | Yes | Yes | — | — |
| Admin: users, tax mode, owner-only settings, restore, import, linking the subscription | Yes | — | — | — |
A Manager's Admin has no Users tab. In Settings, the settings marked owner only (sign-in and lock-out times, discount limits, the backup folder and others) are shown greyed out, and the tax mode is shown but not offered. Backups has no Restore buttons, and Export / import has only the export.
Important: do not let the store trade on the owner's login. Give each person their own account, so cost prices stay hidden and every record names the right person.